Installation
Renderplas PVCu beads are all made locally from exterior grade UV resistant PVCu so they can be installed both inside and out. They are fast and easy to install and perfect for all renders including sand and cement. Standard industry practice can be used on blockwork, timber frame and external wall insulation systems to cut and fix the beads which are safer to handle than cut metal.
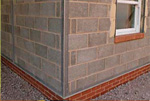
Blockwork
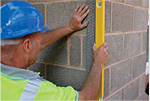
On blockwork, beads are set onto render dabs to the required depth and plumbed straight. Adhesive mortar can also be used for faster drying and to prevent slipping. Larger profiles, particularly wide wing beads, can be fixed with non-corrosive mechanical fixings alone as the flexible wings take up irregularities in the background, with the strong arris remaining straight. Nail clouts or hammer-in plug fixings are suitable for this.
Timber frame and external wall insulation systems
On timber frame and external wall insulation systems, there is no need to set the beads onto render or adhesive mortar if the surface is level. Suitable fixings should be chosen depending on the background.
Assess the substrate for large irregularities. These should be dubbed out with mortar which is then allowed to set hard prior to application of beading.

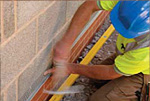
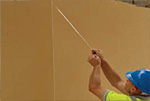
Cut beads to the required length. Tin snips are normally used, or a fine toothed saw for precision mitres or cutting larger movement joints.

Trowel on render dabs onto the background surface. Adhesive mortar can be used instead to increase the level of grip and reduce slipping.

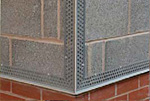
Set stop beads into the render dabs and push into reveals against window and door frames. Push corner beads onto external corners and tap to level.

Once the beads are aligned, apply render over the wings and allow to set hard.

Fix bellcast beads onto a continuous line of render dabs, or better still, onto adhesive mortar to prevent slipping.
Alternatively nail clouts or hammer-in plug fixings can be used along the length of the bellcast bead every 300-700mm.
The beads are rigid enough for one person to fix alone. When using hammer-in fixings, the strong arris helps prevent the bead from deflecting.

At a change of finish, stop beads can be fixed either mechanically or onto render or mortar dabs.

Leave a gap of 8-14mm between bellcast beads at a movement joint and fix the bead over the top on render dabs, adhesive mortar or with mechanical fixings and plumb straight.
Once the render dabs or mortar have set hard, the system is ready for rendering.
Where beads meet, compound mitres give the best even finish especially in highly visible areas but wings can be overlapped instead to save time.
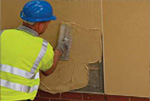
Sand and cement render is applied to the required depth. Through-colour render is applied 2-3mm thicker than the required finish.

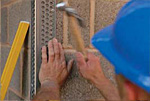
Care should be taken to push the render into the edges of the beading to eliminate air pockets.
When scraping back through-colour render, take care not to make contact with the flexible membrane on the movement joint as this will cause it to fail.

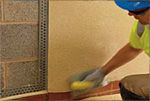
The render should be left level with the edges of the beads which are exposed to give a neat finish.
Movement joints come with a protective strip over the flexible membrane. This is removed as the render is going off but before it sets hard.
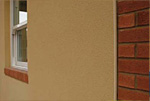
All beads can be wiped down where necessary. The end result is a superior finish, even without painting.
 Beading solutions for a sustainable future